
Blog
How to Install Roller Blinds: Complete DIY Guide
Installing roller blinds is one of the most satisfying DIY projects you can tackle-it’s straightforward, requires minimal tools, and transforms your windows in under 30 minutes. Whether you’ve ordered made-to-measure roller blinds or you’re fitting blinds from any supplier, this comprehensive guide will walk you through every step.
At Dublin Blinds, we offer professional fitting services, but we also believe in empowering our customers to install their own blinds if they prefer. Follow this guide for a perfect installation every time.
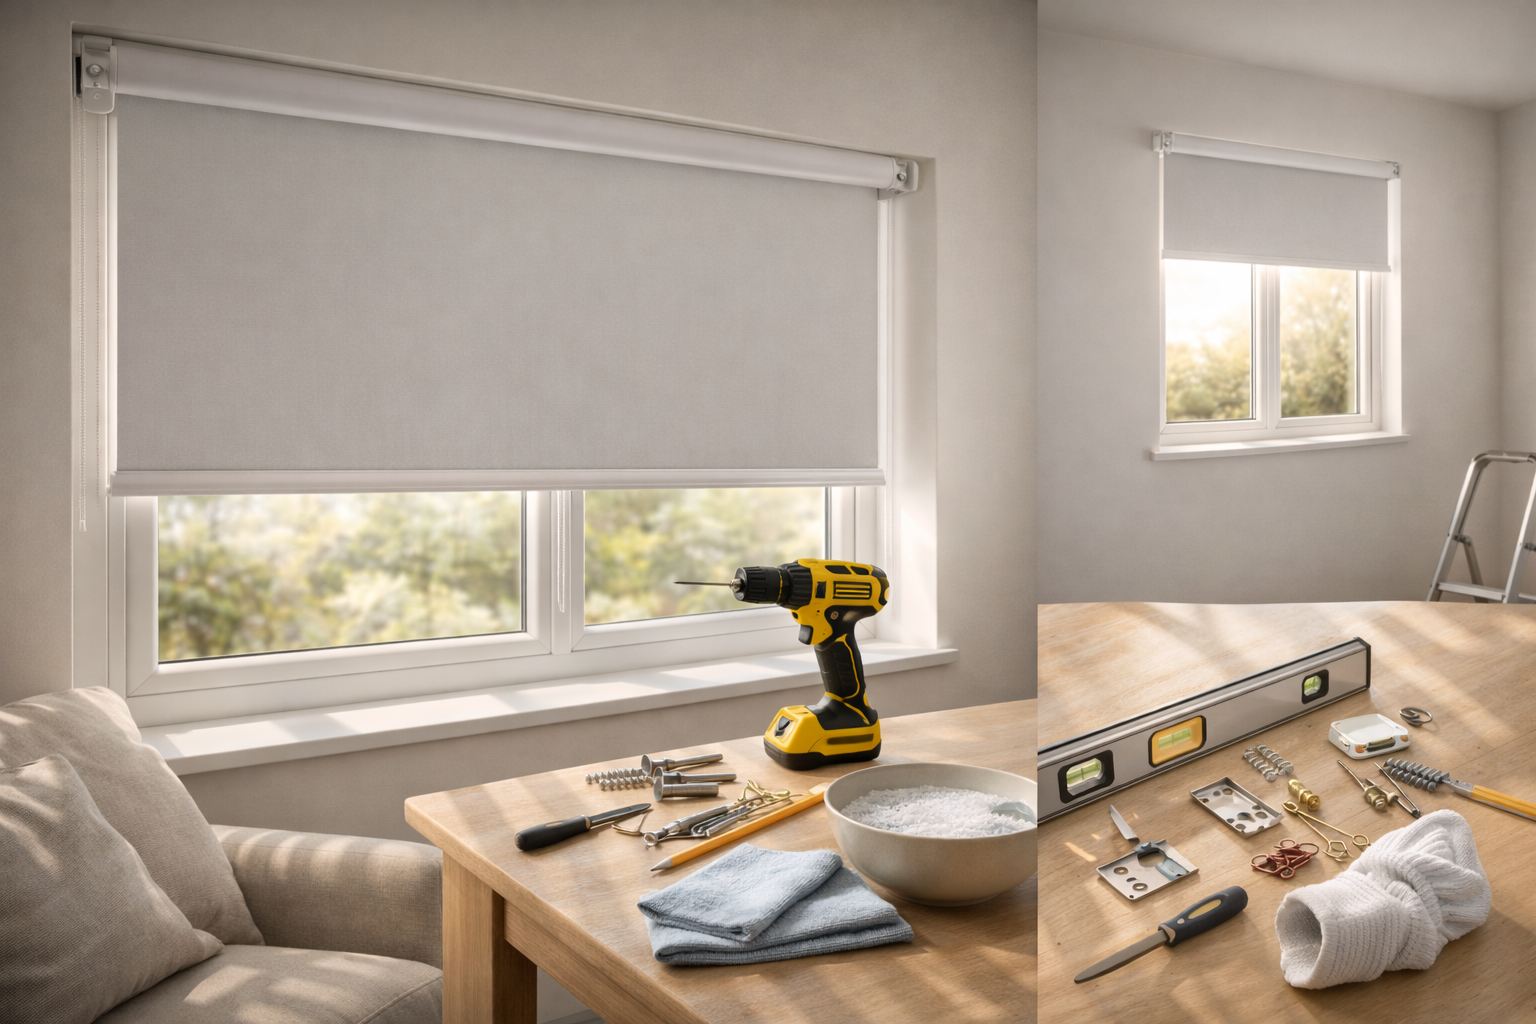
Tools and Materials You’ll Need
Essential Tools
- Cordless drill: For creating pilot holes and driving screws
- Spirit level: Ensures your blind hangs straight
- Pencil: For marking bracket positions
- Tape measure: For checking positions
- Screwdriver: Phillips head for most brackets
- Step ladder: For comfortable working height
Materials Usually Provided
- Mounting brackets (typically 2)
- Screws (for both wood and masonry)
- Wall plugs (for masonry mounting)
Additional Items (Sometimes Needed)
- Masonry drill bit: If mounting into brick or concrete
- Stud finder: Helpful for plasterboard walls
- Safety glasses: When drilling overhead
Pro tip: Have all tools ready before you start. There’s nothing worse than being halfway through and discovering you need a trip to the hardware shop.
Before You Start: Pre-Installation Checklist
1. Unpack and Inspect
- Check the blind matches your order (size, colour, fabric)
- Ensure all brackets and fixings are included
- Test the blind mechanism before fitting
- Note which bracket is left and which is right (if marked)
2. Understand Your Mount Type
Your blind will be designed for either:
- Inside mount (recess fit): Brackets attach inside the window recess
- Outside mount (face fit): Brackets attach to wall/frame outside the recess
If you’re unsure, check your order confirmation or measure the blind against your window.
3. Identify Your Wall Type
- Timber frame: Screw directly into wood
- Plasterboard: Locate studs or use appropriate fixings
- Brick/concrete: Drill pilot holes and use wall plugs
- uPVC window frame: Use self-tapping screws (no pre-drilling needed)
The wall type determines which fixings and technique you’ll use.
Inside Mount Installation (Step-by-Step)
Inside mount creates a clean, built-in look with the blind sitting inside the window recess.
Step 1: Position the First Bracket
- Hold the bracket against the top of the window recess
- Position it 3-5cm from the side wall
- Use a spirit level to ensure it’s perfectly level
- Mark the screw holes with a pencil
Top mounting vs face mounting: Most inside mount blinds attach to the top of the recess (ceiling of the recess). Some can be face-mounted to the side of the recess if depth is limited.
Step 2: Position the Second Bracket
- Measure the exact distance between the blind’s bracket clips
- Position the second bracket at this exact distance from the first
- Double-check with a spirit level across both brackets
- Mark the screw holes
Critical: Brackets must be perfectly level and the correct distance apart, or the blind won’t operate smoothly.
Step 3: Fix the Brackets
For wood:
- Drill small pilot holes on your pencil marks
- Drive screws through the bracket holes into the wood
- Ensure brackets are firmly secured
For masonry (brick/concrete):
- Drill holes using masonry bit (typically 6mm)
- Insert wall plugs
- Drive screws through bracket into plugs
Step 4: Hang the Blind
- Hold the blind headrail up to the brackets
- Click or slot the blind into place (method varies by brand)
- Test that the blind is securely held
- Operate the blind to check smooth function
Step 5: Final Adjustments
- Test the blind goes up and down smoothly
- Check it stops at desired positions
- Ensure fabric hangs straight and doesn’t rub the sides
Outside Mount Installation (Step-by-Step)
Outside mount positions the blind above and outside the window recess, providing better light blocking and making windows appear larger.
Step 1: Mark the Centre Point
- Measure and mark the centre of your window
- This helps ensure the blind is centred when hung
Step 2: Determine Bracket Height
- Decide how high above the window to mount (typically 5-10cm)
- Allow space for the rolled-up blind to sit above the window
- Mark a level line at your chosen height
Pro tip: Hold the blind up at different heights before fixing to visualise the final look.
Step 3: Position the Brackets
- From your centre mark, measure half the blind width to each side
- Position brackets at these points on your level line
- Check with spirit level
- Mark screw holes
Example: For a 90cm wide blind, mark 45cm left and 45cm right of centre for bracket positions.
Step 4: Fix the Brackets
For plasterboard walls:
- Best option: Locate wall studs and screw into those
- Alternative: Use plasterboard anchors rated for the blind’s weight
- Avoid using regular wall plugs in plasterboard-they can pull out
For brick walls:
- Drill holes using masonry bit
- Insert wall plugs
- Secure brackets with screws
For UPVC window frames:
- No pre-drilling usually needed
- Use self-tapping screws provided
- Be careful not to over-tighten
Step 5: Hang and Test
- Click/slot the blind into brackets
- Test operation
- Adjust if needed
Troubleshooting Common Problems
Blind Won’t Roll Up Smoothly
Possible causes:
- Brackets not level-remove and reposition
- Brackets too far apart-blind under tension
- Brackets too close-fabric catching on brackets
- Chain/cord mechanism tangled-gently untangle
Blind Hangs Crooked
Possible causes:
- Brackets not level-check with spirit level and adjust
- One bracket higher than other-re-measure and reposition
- Fabric not rolled evenly-unroll and re-roll on the tube
Blind Falls Out of Brackets
Possible causes:
- Not fully clicked in-push firmly until you hear/feel the click
- Wrong brackets-check you’re using the correct ones for your blind
- Brackets too loose-tighten screws
Light Gaps Around Edges (Inside Mount)
This is normal for inside mount. For better light blocking:
- Order blinds slightly wider next time
- Add side channels (accessories for some blinds)
- Consider outside mount for bedrooms
Blind Rubs on Window Handle
Solutions:
- Reposition blind further from window
- Replace with shorter handle
- Change to outside mount
Important Safety Considerations
Child Safety
Blind cords and chains can pose a strangulation risk to young children. All our blinds comply with UK/EU child safety regulations, featuring:
- Breakaway connectors on cords
- Cord cleats to secure loose cords out of reach
- Cordless options available
Installation requirements:
- Install cord cleats at least 1.5m from floor
- Keep cords tensioned and secured when not in use
- Consider cordless or motorised options for children’s rooms
Ladder Safety
- Ensure ladder is stable before climbing
- Have someone hold the ladder if possible
- Don’t overreach-move the ladder instead
- Wear appropriate footwear
Drilling Safety
- Check for pipes and cables before drilling (use a detector)
- Wear safety glasses when drilling overhead
- Let the drill do the work-don’t force it
When to Call a Professional
While most roller blind installations are straightforward, some situations benefit from professional fitting:
Consider Professional Installation When:
- Multiple windows: Save time and ensure consistency across all blinds
- Difficult access: Very high windows, stairwells, or awkward angles
- Complex windows: Bay windows, skylights, or unusual shapes
- Motorised blinds: May require electrical connection
- You’re not confident: No shame in leaving it to experts!
Dublin Blinds Professional Fitting
Our fitting service includes:
- Expert installation by trained fitters
- All necessary tools and equipment
- Full testing of all blinds
- Removal of packaging
- Demonstration of operation
Contact us to add professional fitting to your order.
Post-Installation Maintenance Tips
Once installed, keep your roller blinds looking and working their best:
Regular Cleaning
- Dust weekly with soft cloth or vacuum brush attachment
- Spot clean marks with damp cloth and mild soap
- Let blind fully dry before rolling up
Mechanism Care
- Operate blinds gently-don’t yank the chain
- Fully lower blinds occasionally to prevent fabric “memory”
- If mechanism stiffens, a tiny drop of silicone lubricant helps
Fabric Care
- Keep blinds raised in humid conditions to prevent mould
- Open windows when cooking to reduce fabric absorption
- Some fabrics can be professionally cleaned-check care label
You’ve Got This!
Installing roller blinds is a rewarding DIY project that most homeowners can tackle with confidence. The key is preparation: gather your tools, understand your mount type and wall material, and take your time getting those brackets perfectly positioned.
Remember:
- Always check brackets are level
- Match bracket spacing to your blind’s width exactly
- Use appropriate fixings for your wall type
- Secure all child safety devices
- Test operation before calling it done
With your new roller blinds installed, you’ll enjoy improved light control, privacy, and style for years to come